Great Cricket Baking Experiment
If we’re friends on facebook, you may have seen my posts about baking with cricket flour. I figured I’d write up the whole experience here since this is an easier format for a longer post.
Background
I’d been a vegetarian for a long time for environmental and sustainability reasons. I recently added a small amount of meat back in to our diet since we can buy directly from farmers. I’ve been reading more and more about insects being a sustainable source of nutrition — for instance, crickets need 6 times less food as cattle to produce the same amount of protein (source: Food and Agriculture Organization of the UN). Which is all well and good, but still. Bugs. I consider myself a pretty adventurous eater, but … bugs.
So the other night at dinner, we were playing a question game, in which one person asks a question and we go around the table and everyone answers. The question was, “what food would you like to try that you’ve never had before?” I answered that at some point, I would like to get over my squeamishness and try insects. I’ll admit that when I said that, I was figuring that I had a few years before I’d have to do that. Chris figured there’s no time like the present, though, and ordered a couple of bags of cricket flour for me.
The cricket flour arrived a few nights ago along with three recipes

bag of cricket flour

note the important allergen warning if you have a crustacean allergy.

[visual description of images: Bag of cricket flour features a large photo of a cricket and says “100% Cricket Flour”. Back of back with information: ingredients listed: “powdered small crickets.” Allergen Warning: Crustacean. Nutrition facts for 10g of flour: 50 calories, 2g fat, 45mg cholesterol, 25mg sodium, 1g total carbohydrates, 7g protein. Paper with recipes for Chocolate ‘Chirp’ Cookies, Banana Cricket Bread, and Cran-Oatmeal Cricket Cookies.]
So what to bake …
I posted on facebook and got a bunch of amused responses and a few ideas of what to make. I was pointed to a few links to start my research:
- From Food and Wine, 6 recipes to try with cricket flour – Important Note: This article mostly talks about a specific brand of cricket flour you can buy that has other ingredients added in so that it can replace regular flour 1:1 in recipes. That is NOT the case with 100% cricket flour like I have. Also note, they had not actually tried baking any of these recipes with cricket flour, they just think they sound like they’d go well… Remember that.
- From Lucky Peach, Baking with insect flour (Lucky Peach is no more, so this link no longer works either) – my big take away from this is that cricket is the absolutely best choice when it comes to insect flour. Also that I have a big, bright line in what I’m willing to consider eating and scorpion flour is way the heck on the other side of that line.
- And finally, I found an article that was actually helpful: Baking with cricket flour is not a gross as you think. From that, I got the information that you can sub up to 1/3 of flour in a recipe with cricket flour. Any more and you start really mucking with the texture.
The great cricket baking experiment
After reading through a bunch of different recipes, I finally decided on 4 different ones to try today. I was looking for a variety of flavors and textures, but wanted to stick with flavor profiles that went with what I’d read was the cricket flour flavor – nutty and a bit malty. I also went mostly sweet with these, with one exception. I have a really strong sweet tooth, and if I’m going to get past my squeamishness around eating insects, using sweets and chocolate are probably the way to do it. During my research and discussions on facebook, I came to the conclusion that cricket flour is probably most like a nut flour in that it’s high protein, but will add absolutely no gluten. I bookmarked a recipe for nut flour macaroons, but I just couldn’t bring myself to bake something that was just crickets, sugar, and egg white. Maybe next time.
I decided on these four recipes:
- Chocolate “chirp” cookies (from the paper that came with the cricket flour)
- Moosewood fudge brownies (from Moosewood Cookbook of Desserts — highly recommended cookbook if you like desserts, by the way)
- Apricot tarragon cocktail cookies (mentioned in the Food and Wine post — recipe here)
- Savory oatmeal cookies (from the Kitchn.com). This last one was inspired by the picture of the apricot tarragon cocktail cookies, which look gorgeous and savory (even though they’re not). As much as I love sweets, I can’t eat them in the mornings (lest I have a distressed stomach), and I’ve been looking for a high-protein breakfast food that’s not sweet and is easy to grab and eat as I walk the 3 blocks to the vanpool pick up. This seemed like an intriguing possibility.
In all but the chocolate “chirp” cookie recipes, I decided to replace 1/4 of the regular flour with cricket flour — I just followed the chocolate “chirp” cookie recipe as written.
The baking…
Zoe was excited to help me with the baking, though she wasn’t sure about actually handling the cricket flour. Once we got going, though, she was totally fine with it.

cricket flour in a bowl
The cricket flour looks like a light brown powder. It’s just a little bit grainy and it smells like something I can’t quite identify (maybe because I’ve never bothered trying to smell crickets before). It doesn’t smell bad, though. It mixes up well with flour, but it does make batters a darker color than they’d normally be.
I’ll write up the results in the order that they came out of the oven…
The Brownies
We started with the brownies, which have very little flour to begin with. The recipe calls for 1/2 cup of flour, so we did 1/8 cup cricket flour and 3/8 cup regular flour.


[visual description: Zoe mixing up brownie batter and the finished pan of baked brownies]
The brownies smelled great, just like regular brownies.

taste-testing selfie
…and they tasted really good, too. The recipe mentions that if you use pastry flour instead of all-purpose flour, you’ll get a more cake-y texture. These brownies are definitely a little on the lighter, cake-ier side, rather than really dense and fudge-y. Hazel has eaten at least 3 of them by last count. If you have to convince someone that cricket flour is not bad, this is a solid choice. That is, if they like chocolate. Zoe’s not a chocolate fan, so she declared these “too chocolaty”.
The savory oatmeal cookies

We made the savory oatmeal cookies next, using the recipe, but I didn’t sprinkle any salt on top. I also didn’t hear the timer go off, so these had an extra few minutes in the oven. But I think they still turned out ok. I mean, rosemary, parmesan, and cracked pepper is a pretty nice combination. There was just a hint of graininess to the texture, but not in a bad way. I think these are the ones I’m most likely to make again, and seem to lend themselves to playing around with other savory flavor combinations.
Neither Zoe nor Hazel liked these, but I think that was because they are savory, not because they’re bad.
Chocolate “chirp” cookies
The recipe is a pretty standard chocolate chip cookie recipe with lots of chocolate chips. And a half cup of crickets. The cookie dough is slightly darker than you’d expect, but otherwise looks and feels like normal cookie dough.

They bake up just like chocolate chip cookies, too.

…and they taste really good. Again, just a bit of graininess. If I didn’t know what was in them, I’d probably assume that someone had put in a little bit of whole wheat flour. This would be my other choice of a recipe to use to convince someone to try cricket flour (assuming they like chocolate chip cookies).
Apricot-tarragon cocktail cookies
I made these mostly because the picture was just so beautiful and tempting. Just look at those beautiful rounds with bright herbs and golden apricots. Yeah. Deceitful pictures, those. There is something deeply wrong with these cookies and I don’t think it’s the cricket flour. The raw dough was just really unpleasantly soft. It has to be frozen for an hour before you can cut them out, and as it thaws it just kind of disintegrates. Bleh. The flavor isn’t great, either. You’d think with the tarragon and the apricots that there’d be some interesting flavors, but they really don’t taste like much at all. Not recommended. I didn’t even get good pictures.
Final thoughts
- Cricket flour baked into things is just fine if you don’t replace more than 1/4 of the flour with cricket flour. According to one article, you can replace up to 1/3 of the flour, but I wouldn’t go more than that. The difference in texture is noticeable, but not unpleasant.
- These experiments got me to taste cricket flour and I can say that it was fine.
- That said, the subconscious is a really interesting thing. Even though I’d tried the baked goods and liked them, I did not eat them mindlessly the way I normally eat sweets, and I didn’t lick the bowl or the spatula, either. That’s possibly worth keeping in mind if I want to have sweets in the house but I don’t want to just eat them mindlessly.
- At the ratio I used, you’re not actually increasing the protein value of the baked goods by all that much. By my rough estimate, if you eat 6 chocolate “chirp” cookies, you’ll get 1g more protein than you would with regular chocolate chip cookies.
- While I liked 3 out of the 4 recipes we made, I’m not sure I’ll make any again unless someone asks me to. Cricket flour is expensive (based on a really quick Amazon search, cricket flour is around $2.28/ounce — by comparison, almond flour is around $0.50/ounce), and as mentioned above since you’re not using a lot, I’m not sure it adds much nutritional value to a treat that people tend to eat sparingly anyway.
- I really like the idea of the savory oatmeal cookies, and I plan to play around more with those recipes.
- The four recipes used up a 3.5 oz bag. I have another bag left, I need to think more about other ways to use the cricket flour. I’ll post if I come up with anything interesting.
“learn about new things that I’ve never heard of”
Hazel is now 3 1/2 years old. At bedtime, recently, she’s been asking if we could travel to China. I’m not sure where she got the idea that she wanted to go to China. She doesn’t really have a firm grasp on geography yet (if you tell her we live in Minnesota, she’ll argue that no, we live in Minneapolis). She does know that it’s a long airplane flight – I’m sure that’s part of the appeal. So I asked her what she thought she’d do if we visited China.
“Well, I’d learn about new things that I’ve never heard of”
Which… is a pretty good argument for travel, actually.
A pretty good goal in life, too.
The rhubarb bars they didn’t want you to try*
My farmer’s market has two bake-offs each summer – rhubarb in June and apple in September. On bake-off day, you bring in 60 servings of your creation to the market, and then people can pay $5 to try one of each entry and vote for their favorite. Last year I entered the apple one and had a ton of fun trying to figure out a recipe and baking different versions. Didn’t win, but enjoyed it so much I promised myself I’d try again this year.
I started early trying to figure out what to do with rhubarb. I originally thought I wanted to do a rhubarb shortcake, but I realized early on that it wouldn’t hold up well to sitting out for a couple of hours at a farmer’s market (plus, it turns out I wouldn’t have been able to serve it with whipped cream). So I started playing around with a rhubarb cheese cake bar. I baked a lot of cheese cake bars and experimented with the proportions and crust and other things and fed many friends, neighbors and co-workers the results. And I finally got to something I really liked: a creamy cheese cake bar with a whole lot of tart rhubarb. Plus, it’s kind of pretty:

Then, the day before the farmer’s market (thankfully before I’d started baking), I got the call. The call saying that my entry wouldn’t be allowed. It’s not shelf-stable, which means the health department won’t let them serve it. Which, now that I think about it, I feel super silly about not realizing. It was in the rules, but I read it as saying that you shouldn’t enter something that you would want to stay refrigerated – I had even tested to make sure they would hold up after a few hours un-refrigerated and they were fine. I do totally get why the rule is in place, though, and it’s totally my fault for not paying closer attention to the rules. Still, I’m a little bummed that I didn’t get to enter.
But I can still share the recipe here. It’s a little bit involved, but wasn’t actually too hard, especially if you do the rhubarb part ahead of time. Oh, and one of my problems was that I couldn’t come up with a good name for these, but now that they were disqualified, I present…
Illegal Rhubarb Bars
(* The title of this post and the name for the bars should be seen as poking fun at myself and mocking the silly overly-sensationalistic titles of click-bait articles — other options included: “This woman tried to enter a bake-off, you’ll never guess what happened next” or “Check out this recipe, at step 4 you’ll start smiling, by step 8, you’ll be amazed” or “What secret ingredient got these rhubarb bars banned from the farmer’s market?“. I hold absolutely no hard feelings towards our farmer’s market, which I love.)
Makes 1 9×13 pan, which you can cut into 32 bars (or even more, if you want to cut them super small like I did)
Ingredients:
Rhubarb filling
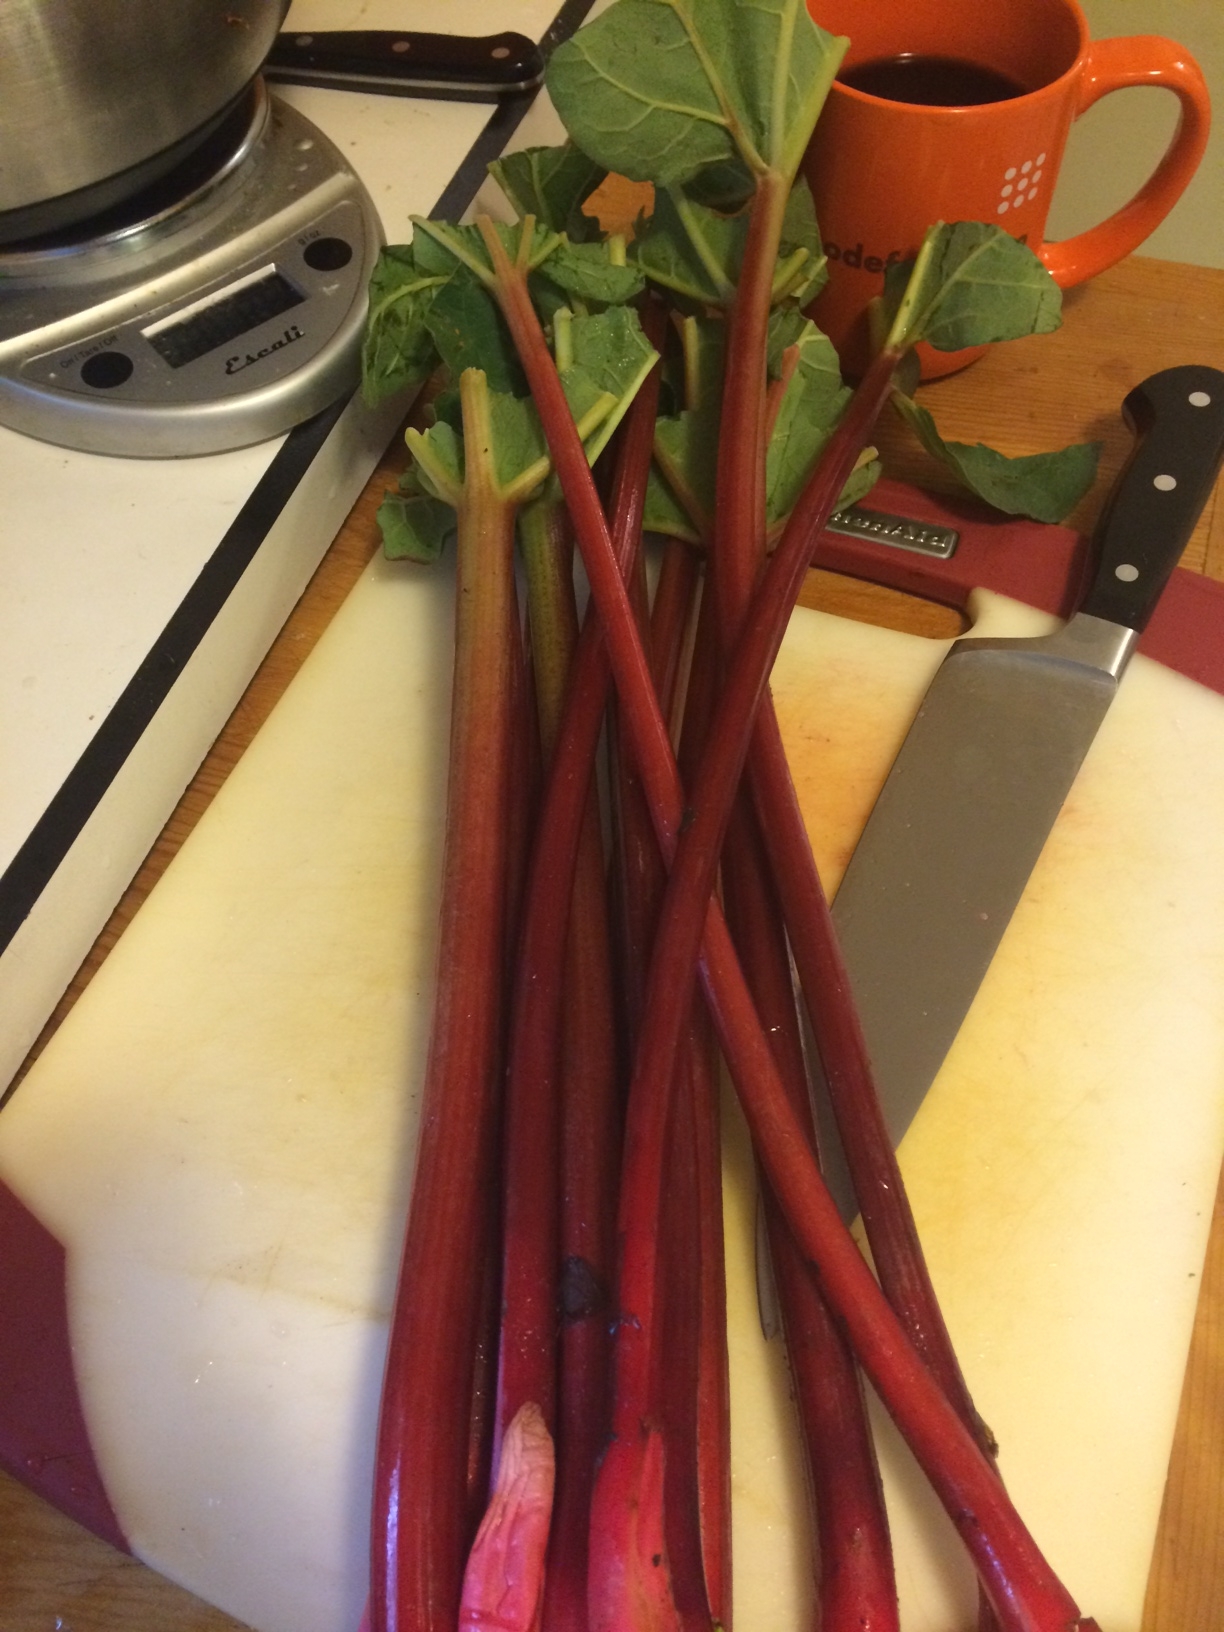
The rhubarb I got from the farmer’s market was gorgeous – the deeper the color, the prettier the final bars.
- 2 pounds of rhubarb, chopped into 1/2 inch pieces. Make sure you removed all leaves.
- 1/3 cup of honey
- dash of salt
- 1 Tbsp corn starch
- 1 Tbsp cold water
Crust:
- 1/2 cup (1 stick) unsalted butter, softened
- 1/2 cup brown sugar
- 3/4 cup whole wheat flour
- 3/4 cup white flour
** I imagine that you could probably make the cheese cake bars gluten-free if you made the crust with either 1/2 cup butter and 1 1/2 cups of crumbs of your favorite gluten-free shortbread cookie, or possibly even replacing the flour with ground nuts like almonds or pecans
Cheesecake:
- 16 oz (2 packages) cream cheese, softened
- 1 cup sugar
- 1/4 cup heavy cream
- 3 large eggs
- 2 tsp vanilla or seeds from half of a vanilla bean
- 1 Tbsp corn starch
Directions
The rhubarb – you can make this way ahead of time.
- Heat the oven to 400° F.
- Toss the rhubarb pieces, honey, and salt into a 9×13 baking dish. Let it sit for 30 minutes and then stir.
- Cover the dish loosely with aluminum foil and bake for 30 minutes, or until the rhubarb is tender. Stir one time half way through.
- Place a colander over a medium bowl and pour the rhubarb and juice into the colander. Let the juice drain for about 10 – 20 minutes. Set the baked rhubarb to the side, it will probably have totally fallen apart and be kind of a thick rhubarb paste, that’s totally fine.
- Mix the corn starch and cold water in a small bowl.
- Pour the juice into a pan and put it on the stove over medium-high heat and bring to a boil.
- Once the juice is boiling, take it off the heat and whisk in the corn starch and water.
- Put the juice back on the stove and cook for another minute while whisking.
- Ok, now here’s the kind of weird part: Take about 4 Tbsp of the juice that you just made and mix it in with the rhubarb paste. Now take about 2 Tbsp of the paste and mix it in to the juice. So you’ll have two things: a thickened juice with some pieces of rhubarb, and a thick paste of rhubarb (with a little bit of juice mixed back in).

Rhubarb two ways: The rhubarb paste in front, the thickened juice in back (this picture is from a double batch).
- If you made this a day or two ahead of time, store in the refrigerator until you’re ready to use it.

For the crust
- Heat the oven to 350° F. Line a 9×13 pan with parchment paper (aluminum foil would probably also work, I tried just greasing the pan with cooking spray, and it worked but it was hard getting the bars out.
- Mix the butter, sugar, and flours until combined. It won’t hold together like dough, it’ll be more like crumbs.
- Press the mixture onto the bottom of the pan. Maybe 1/8 – 1/4 of an inch thick. You will have some left over mixture.

Hazel helped with this part.
- Bake for 10 minutes. It shouldn’t really change color.
- Remove from the oven and let it cool for 10 minutes.

For the cheesecake
- Turn the oven down to 325° F.
- Mix the cream cheese and sugar together until smooth. I had to do a lot of scraping the bowl with a spatula to get it all mixed together.
- Add the eggs one at a time and mix together.
- Add the cream.
- Take 1/4 cup of the cheese cake batter and mix it together with the thickened rhubarb juice and set aside.

Pretty rhubarb cheesecake batter
- Add the cornstarch and vanilla to the rest of the (non-rhubarb) cheesecake batter and stir.

Assembling the bars
- Spread the rhubarb paste (there has to be a better name for this) evenly over the top of the crust.

- Pour the vanilla cheese cake batter over the rhubarb and use a spatula to spread it evenly.

- Carefully pour the rhubarb cheese cake batter in two long lines down the middle of the pan. Use a knife or spoon to artfully swirl the two batters so they look pretty. (I am not good at this).
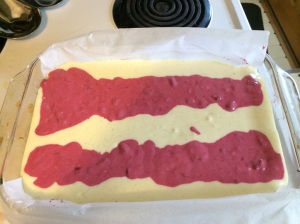

Swirly
- Bake for 45-55 minutes. The top should be set and if you have an instant read thermometer, the batter in the middle of the pan should be 180° F.
- Remove and let the pan cool for 30 minutes.
- Place the pan in the refrigerator for at least 4 hours, overnight is even better. (You have to do this, or else you’ll have to eat these with a spoon. Which wouldn’t actually be such a bad thing.)
- Cut into squares and serve (but not at the farmer’s market).

- Since I don’t need a full pan sitting in my refrigerator, I cut mine tiny and then put them on a tray and froze them. They’re pretty good frozen, too.


Kickstarter thoughts 2: An Introvert’s Guide to Kickstarter
I’ve been thinking about the introvert’s guide to Kickstarter for a while now. At first, I joked that it would consist of two words, “Just don’t.” But that’s not true or fair. My campaign did actually fund, so it would be disingenuous to say that, and even beyond the funding, I am thankful that I did the Kickstarter. It was hard for this introvert, though, so I thought I’d share some coping strategies.
Before jumping in, I’m aware that there’s probably been way too much made of the differences between introverts and extroverts, with articles like “83 surprising signs that your introverted cat is actually extroverted” (my cat really is introverted, or at least very scared of loud people, but I digress). Like many personality traits, I expect it’s more of a scale rather than a strict dichotomy, and different people mean very different things with the label introvert. Whatever. I identify as an introvert, and have a lot of the traits that are associated with introverts: I have trouble initiating conversations, especially if it’s to talk about myself. I don’t enjoy being the center of attention, and generally don’t try to call attention to what I’m doing. I don’t mind talking in front of groups, as long as I was invited ahead of time with enough lead time that I can plan out what I’m going to say. If you wait for me to just jump in to a conversation to tell you about my project – even if there was a perfect opening – you’ll be waiting for a very, very long time. In short, if you look at Kickstarter’s own guide to promoting your campaign, everything in that list makes me queasy and anxious. So that’s where I’m coming from
And a couple of quick caveats: I offer these thoughts because parts of the Kickstarter campaign was so hard for me, and I wanted to share things that made it better. And maybe this will be helpful to extroverts, too, who knows? My campaign was not a runaway success, but it was successful. And anyway, this isn’t a guide to being successful (there are plenty of good guides to successful campaigns – here’s a couple more), it’s a guide to coping with the terrifying promoting-your-project parts . Also, I am not Internet famous, my thoughts are probably unnecessary if you have a very large and devoted following online, no matter how introverted you are.
Why Kickstarter is awesome for introverts
In many ways, Kickstarter is the perfect vehicle for an introvert to fund a project. You just write up your project, put it out there, post about it on the social media platform(s) of your choice and yay! People fund it. And you never even had to talk to anyone in person or on the phone. At least that’s the theory. Obviously, there’s more to it than that (that’s why this guide was written), but let me be clear: there is no way I would have gotten funding for my book if I had needed to acquire it by more traditional means like actually talking up the project to people in person.
Kickstarter also forced me to go outside my comfort zone and learn to talk about what I was doing, and figure out how to ask for help. There’s a lot to be said for doing things that push you in to new situations and challenge you. And boy did it challenge me. Now, I’m not going to quit being a librarian and become a sales person because of this campaign, but it was valuable for me to see that I can approach people and talk to them about my projects. Turns out people don’t automatically turn off or yell at you when you ask for things.
And that leads me to my third reason that Kickstarter was awesome. Since I had to put myself out there and had to ask for help, I got the benefit of seeing that I do have an awesome support system and lots of people who believe in what I’m doing and were willing to not just be a backer, but to go above and beyond and really help me with the campaign. And these weren’t only people with kids in glasses or some other personal stake, but friends and family and friends of friends who just think it’s a good idea that they want to see happen. It’s easy for me to keep to myself about these things that I’m passionate about. But when I do that, I don’t get the chance to find out what others think about it. It was wonderful to learn that other people thought my book was a good idea.
Why Kickstarter made me want to curl up in the fetal position under my bed
So it’s all well and good that Kickstarter exists and that it pushed me to put myself out there, but the campaign was hard and draining and filled me with all sorts of awful self-doubts. It’s easy to look back from the perspective of being funded and say it was worth it, but the difficulties and fears and doubts were very real.
Here’s some of the things that had me at least metaphorically cowering under my bed (I never actually crawled under my bed, it’s dusty under there, and my figurative bed is easier to fit under):
- I had to make a video. If I were a wizard at video-producing, I probably could have had a video with someone else doing a voice-over and no images of me at all. But I’m not, so not only did I do a video, but it was just me talking about my project (with Zoe as my much-needed crutch).
- I had to post links to that video to all my social networking sites.
- I had to post that link again.
- I had to ask people give me money.
- I sent unsolicited emails to strangers asking them to give me money.
- Did I mention posting that link to facebook again and again?
- I contacted local tv and radio news stations about my campaign. None of it led to anything, but if it had, I would have had to actually be on the news about this.
- I posted to facebook again. Also to Twitter and Google Plus.
The low point was in the middle of the campaign, when the pledges had dwindled to a very slow drip. I figured that I’d hit the limits of my friends and acquaintances’ network. But there were all these wonderful friends who had stepped up to help and I didn’t want to let them down, but I just didn’t know what else to do. I sat in front of the computer for hours those nights, staring at the screen hoping that my stares would somehow bring in more pledges. Then I’d refresh the Kickstarter page and see that nothing had come in. I knew I needed to act to bring in more pledges, but I was completely tapped out. It’s pretty well established that many Kickstarter campaigns have a very slow part in the middle weeks, so I’m guessing I’m not the only one who felt lost in that awful middle section.
Coping Strategies
Obviously I made it through, largely thanks to many wonderful friends (who show up quite a bit in my list below). Here’s my list of strategies that helped me survive all the promoting and being all outgoing and social parts of the Kickstarter:
- Find a trusted extrovert. You’re going to feel like you’re posting or emailing or talking too much about your project. Find someone who is much more outgoing than you who can tell you if your update is lame or if you’ve inundated your social media feed too much with your posts (chances are it isn’t and you haven’t, but you’re going to want someone else to tell you that). On the really bad days, you can even ask them to draft a post or update for you. That leads to my next strategy…
- Ask for help. You can’t do this alone. If you’re like me, you’d rather just do this on your own, but it’s called crowdfunding for a reason. This is the time to get over yourself and ask friends for help. You probably haven’t asked them for help much before and it’s entirely possible that they’ll want to help you. Think about what would be helpful: getting the word out, a pledge, a blog post, creating visuals, etc. And then ask if they’d be willing to do that. It will be out of your comfort zone, but this is one of those things where it’s good to push yourself and do it. One of the biggest things for me was to get notes of introduction. I have a really hard time contacting people if I have no connection with them. Having a mutual friend introduce me made talking with them a lot easier.
- Identify people who are excited about your project. This goes along with the point above. If you’re having trouble asking for help, think about who has been excited about your project. You may be surprised by who that is. If you’re like me and haven’t talked about your project much, then you probably don’t have any way of knowing who is interested. Now that you’ve put your project out there, you’re more likely to hear from people who are excited about it. Those are the people who not only want you to succeed, they’re also likely to be happy to help you.
- Come up with a plan of one thing you can do each day. It helped me a lot to have a list of different things I could do: contact someone personally via email, contact a local newspaper, write a facebook post, write a Kickstarter update, etc. Then I would make sure I had done at least one of those things each day. I’m not organized enough to have a schedule of these things, but I did keep a mental list. Some days, I felt up to doing more, so I did more, but having that list helped a lot on those days that I felt completely lost.
- Give yourself a day off, and make sure you do something entirely different. You’re going to need to recharge. If you decide to take a day off (which I recommend), make sure you do something that’s away from your computer and your phone (if you’re getting phone notifications). Constantly refreshing Kickstarter to see if there’s a new pledge will not help you recharge. Find a great book, go for a long walk, go out with a friend (but don’t talk about the campaign). Just let your mind focus on something else for a bit.
- Give yourself a safe space and boundaries. I decided that church was going to be my safe space. At church, I was just going to be Ann, and I wasn’t going to talk about the Kickstarter at all. I know a lot of people will say that you need to work every single network that you have, but for me, it was extremely helpful to know there was a community where I didn’t have to be “on” about the campaign. I also tried to keep strong boundaries at work. I let my boss know that I was running the campaign, but otherwise, didn’t talk about it unless someone asked me (I’m friends on facebook with a lot of my work colleagues, so it did come up occasionally).
- Find a balance. A lot of guides talk about how you need to spend all your time and energy promoting your campaign. You will have to push yourself in order to be successful, but you can burn yourself out really, really quickly. Hiding under your bed will do nothing to advance your campaign. If people are telling you to do something that just does not feel like you, give it a try once, but if it really feels wrong, step back and do something else. Being genuine counts for a lot in these things, but that requires you to actually be genuine. Don’t post things that someone else writes for you – yes, above I said you could use your trusted extrovert to draft an update or post for you, but the key word is draft. Make sure that what you do and what you post still feels like you.
See part 1 of my Kickstarter thoughts: the basics. Though the campaign is over, you can take a look at my Kickstarter page, too.
Kickstarter Thoughts: Part I, the basics
So for anyone following along from that last post, the Kickstarter for my book was successful (hooray! huge sigh of relief! and thank you, thank you to everyone who supported me, financially or emotionally!)
It seems like the thing to do once you’ve run a successful Kickstarter campaign is to write a post with Kickstarter tips. Mostly, I want to write an introvert’s guide to a Kickstarter campaign, but I’ve already gotten a couple of requests for some basic tips, so I thought I’d start with those since I had already written them up. I do want to say that much of what I learned came from people who I turned to for help when I was first getting started. Kickstarter seems to inspire people to want to help others have successful campaigns. But I wanted to give a huge, huge thanks to Jessica from Eye Power Kids Wear who gave me all sorts of great advice and help along the way. In fact, that might be the first tip: Find someone who has done this before who believes in your project and wants you to succeed. Their help will be invaluable!
A couple of caveats: I am no expert at this. I’ve done this once, and while I was successful, the campaign was not a runaway success. These are the basic tips for people doing their first Kickstarter. If you’re on to your second or third, you probably don’t need my advice. Also, there’s a ton out there written about this already. You should really read more than just this post if you’re planning on doing this.
Kickstarter Logistics
- Start getting your Amazon accounts linked now. You might get rejected a few times. I did, with no explanation. I called and they said they’d look in to it, 2 days later, it was approved, but you can’t start your Kickstarter until that is complete, so you might as well start now.
- Once you have your Kickstarter page mostly set up, submit it for approval. You don’t need to have the video recorded or all the rewards entered. Your Kickstarter can be updated after it’s been approved before it is made live. It only took them 1 day to approve my campaign, but I’ve heard from others that it can take up to a week. You might as well get it approved early, so once you’re ready to go, you can just push the button and go!
- Make sure you pay attention to Kickstarters rules, both for the products and for the rewards. If you have a question about whether something will be allowed, send them the question. They were pretty quick to respond to me.
- I have no idea if the video was particularly helpful or not. Kickstarter will tell you that campaigns with a video are more likely to fund than those without. But they may be mixing up their cause and effect. There’s a whole lot of Kickstarter campaigns where the creator obviously didn’t put much effort into it. Those don’t often fund. They also tend not to have videos.But either way, I felt like it was expected, even though I almost never watch the videos when I browse Kickstarter. My video was not sophisticated at all (you can watch it if you want). I went for a simple and direct video. I wrote the script and memorized it in a night. My father-in-law shot the video. The one we used was our second take. Chris edited it. There were no special effects. The video is just one shot. The good thing about having done it, is that I had to memorize the script, which means I had a pitched memorized that I could use if someone asked me about the campaign. In the end, about 48% of the people who visited the Kickstarter page watched the video all the way through.
- Have someone (or two) look over your Kickstarter page before you launch. There’s a way to share the preview page before it’s live so you can get plenty of feedback from others.
Rewards
- Look at other Kickstarters for similar projects and see what they have for rewards.
- Make sure you have a $1 reward (even if it’s just a “thank you”), and that you have at least a few other options under $25. I tried to find things that were related to the project, but were less expensive with little to no shipping costs, like electronic copies of the book or bookmarks or note cards for those levels. Others do handwritten thank you notes. I think that’s a nice thing, but I’m bad enough with thank you cards as it is. Adding more didn’t seem like a good plan.
- You also want some higher level rewards. If anything, I think I had too many low cost rewards, but I did have at least one backer at each level, so I don’t know what I would have removed.
- Think about whether you’ll have backers that will want to support you, but aren’t going to be interested in owning your final product. Can you come up with a reward that they might be interested in? I did a reward level that donated a copy of our book to a library or daycare center, but I didn’t get that up until half way through the campaign. I probably should have had that option to begin with.
- Don’t forget to account for shipping costs. For domestic shipping, it should be included in the reward cost.
- International shipping costs are crazy high – they just are. It can really turn off potential backers, and Kickstarter doesn’t let you differentiate between countries. I made a separate reward tier for Canada that was a little higher than the domestic price, but not the full international shipping costs. I did try to facilitate some group purchases where 10 people in the UK or Australia would get together to buy the book and split shipping, which brought it down to less crazy levels, but that was a lot of work for me and others to pull off and didn’t actually work as well as I’d hoped. Offering an electronic or no shipping costs option helps with that, too.
Also worth noting, the money that gets added in for international shipping will count towards making your goal. That’s great for making your goal, but if you just make your goal without much wiggle room, it will not leave you as much money for your other costs. I don’t know what the solution to that is.
Promotion
(this is where I had the most trouble. Tune in for part 2 for my thoughts on how to deal with this if you’re intrinsically not the type of person who is comfortable doing promotion stuff)
- Have a website and a facebook page (and Google+ and Twitter and whatever other account if you’re doing those) set up before you go live. Start inviting people to follow the accounts about a week or so before you go live with the Kickstarter to start getting the word out.
- If you’re using facebook (or Google+, I suppose) to promote, have some different images to use to post. I felt like I was posting a ton and always posting the same image at first. And it’s really sad when you start getting sick of pictures of your daughter. But most people won’t see every facebook post you do, so you will end up posting a lot.
- You will get to see through Kickstarter where backers are coming from and that can help guide you on where to put more effort. Most of my backers came from facebook, though others have reported that they get more backers from emails.
Kickstarting emotions
If you’re friends with me on facebook, you’re probably well aware that I’ve started a Kickstarter campaign. The project is making a board book for babies and toddlers in glasses. It’s an idea that has been rattling in my brain for a long time now. I hear a lot from parents at Little Four Eyes that their kids love seeing pictures of other young kids in glasses, and so that’s what I want to do: make a book with photos of babies and toddlers wearing glasses and playing or otherwise doing things that kids love to do.

You can click the image to see the Kickstarter and read more about the project – and hey, while you’re there, you could support it, or share it!
I read up on Kickstarters. I researched Kickstarters for other board books. I watched some other Kickstarters run – and succeed. At CONvergence, I went to a Q&A session about Kickstarter projects that featured a panel of successful creators. I was starting to feel like I had a good handle on what was involved, and was starting to feel pretty optimistic about how it would go.
And the Kickstarter has gone … well … I think it’s gone ok so far. I knew going in that most projects get a lot of funding in the beginning, and then slow way down in the middle, and then often pick up again at the end. And that’s definitely been the case, there is no question the campaign is in the sluggish middle section, though it has picked up again, now that it’s less than 2 weeks from the end, and it’s more than half funded, so that’s not bad. I think.
So I shouldn’t be surprised by how any of this has gone (though obviously I was hoping this would be one of those that funded in the first day). But what I wasn’t expecting – what none of the articles about Kickstarters seem to talk about – is how emotionally wrenching this whole thing has been. Though perhaps I read the wrong articles, Beth Teitell wrote an article for the Boston Globe about this very thing all the way back in April.
Putting the idea out there in public was scary enough, but since then, it’s been this crazy roller coaster of emotions. One day, I’m riding the wave of excitement at seeing new backers, or reading someone’s post about the project. Later that same day, I’m in despair because there have been no more backers and I’m not sure what to do next. One evening I’ll be jumping around with 50 different ideas of ways to promote the campaign and the next evening, I find myself staring at the computer, hitting refresh on the Kickstarter page hoping that the numbers will just magically rise on their own. I’m overwhelmed with gratitude for all the support I’ve received for this project (118 backers! That’s crazy awesome!) and terrified of letting people down if it fails. And that doesn’t even begin to touch on how difficult it is to ask friends and acquaintances for money repeatedly. There’s a reason I’m not a sales person. Heck, I work in a library because that way I can give people things for free.
So that’s where I’m at. If I were to give advice to anyone starting a Kickstarter — well, first I’d question why you’re taking advice from someone who hasn’t yet successfully funded — I’d say make sure you have some solid emotional support. I’m so lucky that I do. And then I’d say go read all the advice that’s out there and think a couple times before hitting the launch button to be sure you’re ready. And then I’d say to make sure you have some wine (or grappa) handy for the ride.
monarch butterfly costume
This weekend was the Monarch Festival. There’s a fun run for kids, and kids are encouraged to wear costumes. Luckily for me, my parents were visiting the weekend before the festival, and my mom is a miracle-worker when it comes to pulling together costumes — actually, she’s pretty much magic when it comes to anything fiber-related, and she loves figuring out how to make things.
So Zoe and my mom worked together to design and create her wings. Zoe and I made her mask. Zoe and I both I love how the whole thing turned out..

Butterfly from the front.

from the back.

Zoe and the costume in action during the Monarch Festival’s fun run.
When I posted pictures to facebook, I got a lot of requests for instructions. Of course, when we were working on the costume, we didn’t write down the steps, or take notes, or even many pictures. So I wasn’t sure that I could give much in the way of instructions. Then mom surprised me with a written set of instructions. And I was reminded that not only is she amazing with all things fiber and fabric, she’s also a great teacher and writer.
So here’s the butterfly costume instructions, written out by my mom. I wish we had good photos to illustrate.
Instructions for making butterfly wings
Supplies
- Photo of a butterfly for reference if you’re going for realism (we used this one)
- Large paper to draw wing pattern – as big as you want the wings to be
- Thick 1/8“ aluminum wire (easy to shape, jewelry area Micheals)
- Stretchy fine tulle netting, (this one was orange and had glitter all over it, JoAnns)
- Thread (colors should match the felt and the tulle).
- Sewing machine
- 2”X 8” corrugated cardboard (the backbone for supporting the wing wires, cut so the corrugation is crosswise for sticking the wing-wire into)
- Black felt pieces
- Black permanent marker
- Other felt pieces
- ¼ inch Black elastic for straps
Zoe’s part
Draw the shape of the wings you want, (we were looking at a pair of fairy wings for comparison), it’s good if the upper and lower wings overlap a an inch or so
Grammy’s part
- Cut backbone from corrugated cardboard 2 inch by 8 inch
For each set of wings:
- Cut and shape 2 wires with 2 inch extensions for attaching to the backbone.
- Using the wing cut a double layer of tulle about a ½ inch bigger all the way around the wing.
- Stitch with a wide zig-zag, open stitch (should look like wwww so it will stretch) ½ inch seam allowance, leave open about 2 inches at the backbone area
- Turn the tulle-wing right side out, with the seam inside
- To insert the wire into the stitched tulle you will have to collapse it from some point, so the wire looks a little like a large bobby pin. Once the tight fold is inside the tulle you will need to adjust it so all the wire goes into the tulle. Then you should be able to reshape the wing to your pattern. Don’t worry if the tulle is a bit loose, all the stitching and gluing will fix that.
- Repeat for each wing.
- Insert wing-wires through the corrugation, into the backbone. It will all probably be floppy, don’t worry too much. Pull the tulle tight over the cardboard and stitch the tulle to the cardboard, to hold the wire ends in place in the backbone.
- Using a butterfly photo begin to lay out black felt to cover the top edges and mimic the outer markings of the butterfly. Let the black felt extend a ¼ inch or so past the wire edge. Just overlap pieces by an inch or so. (Black felt can hide a lot of mistakes)
- Hand stitch the outline felt pieces on the backbone and the tulle shaping the wire a bit more as you go.
- I had to hand stitch the overlapping areas top wing over bottom wing, to add structural integrity.
Now the fun part of decorating the wings!

Adding the dots to the wings.
Cut lots of ½ inch wide stripes of black felt for the wing markings.
Zoe’s part:
Zoe placed the black felt lines where ever she wanted them on the wings. Grammy pinned the felt in place and stitches them down.
Grammy’s part again:
I was short on time. I was able to do this on the sewing machine by always starting at the outer edge of the wing and stitching towards the backbone.
Some of Grammy’s thoughts on this:
- Hand stitching would be easier
- Putting the markings on before attaching to the backbone would also be easier but harder for the child to imagine while it is in separate pieces.
Ann’s part
Use a wide permanent black marker to draw on the back side of the tulle over the stitching and the black felt. This made the black lines stand out better on both sides of the wings.
Zoe’s part
Glue on felt spots wherever you want them on to the black felt. We tried gluing on to the tulle on the back side of the wings and that didn’t work, but we were able to put the dots where ever there was felt.
Ann’s part
Sew on the elastic straps to the backbone. Crisscross is probably best.
I also sewed a few of the dots down that weren’t staying on well with glue.
I will say that these wings were very bendable, so they’d get bent whenever Zoe hit anything with them (which happens often when you’re at a crowded festival). They were very easy to bend back into shape, but depending on what you want to do with the wings, you might need less malleable wire, which might be harder to work with.
Instructions for making the mask

The mask is based on this fantastic design that a friend came up with for kids in glasses – the mask simply slides on to the glasses, so it stays in place perfectly. It’s genius! There’s a tutorial for the general mask here. But for the butterfly mask, I cut the foam so that there’s a very thin border of foam around the bottom of the glasses and a thicker bit over Zoe’s nose. We threaded a pipe cleaner into the nose and Zoe shaped it to be the proboscis. The whole mask is cut from one piece of foam, but the antennae were a little droopy, so I stitched a pipe cleaner into the back of the mask to give it a little support.
If your child doesn’t wear glasses, you could do a similar mask with sunglasses, especially if they’ll be outside in the costume. There were also a lot of kids wearing headbands with antennae. Zoe was the only kid with a proboscis.
big. round. numbers.
So it’s looking like I’m going to be encountering some big round numbers this month.
The first is likely to be my car hitting 100,000 miles. It’ll probably happen by Monday. My sweet, little purple toaster car. It’s a 2005 Scion xB. The second car I’ve ever owned, and certainly the car I’ve driven the longest and the furthest.

Apparently the only pictures I have of my car are ones I took this spring to show how snowy it was.
I’m also about to hit 1,000,000 views on my Little Four Eyes blog. That’s coming in about 7-8 days. It’s a little crazy to think how much that little blog took off. I’m kinda proud of it. Ok. Really proud. (It’s possible that the Little Four Eyes facebook group could hit 3,000 members this month, but that’s far less likely).

And then, in just 10 days, I’ll hit that big, round number birthday. That’s right, I’ll turn…
.
.
.
…38
just look at how big and round 38 is:

thirty-eight. So big. So round. Just look at the circles you can make from that number.
Kindergartner no more
Today was Zoe’s last day of kindergarten. For the past few weeks, she’s been oscillating between being really excited about the end of the year, and then really sad about the end of the year. Last night, she excitedly told me that when she left the school today, she’d be a first grader. This morning, she told me she was going to wear “sad clothes.”

“Sad clothes” for Zoe: a dress and black tights. Also a jacket because this year, summer has refused to actually arrive.
She was pretty chipper after school, though. Especially since she now knows that her best friend would be in her class again next year.
It’s crazy to think back over the year about all that she’s learned: She’s reading now, and writing. She’s started doing adding and subtracting, and lots of pattern recognition. She did her first library research (a report on horses). Her drawings are getting to be as good as mine (not that I’m a particularly amazing artist. At all). She asks great questions and is curious about things. I can’t wait to see what she learns in first grade, but for now, she gets a bit of a well-deserved summer vacation.

From her writing journal: “I am proud of my reading! I can read a lot of stuff!”
Yes read the book!
Watching Zoe learn to read has been one of those crazy things. In a way, it’s very reminiscent of when she was first learning to talk. Before starting kindergarten, she had one or two words she recognized (“no”, “on”, and “zoo”), but then she started coming home with small simple books, and she’d work hard and slowly and we’d get through them. And then the books got more complicated. And thank goodness, too, because listening to Zoe read the first one, that first time was awesome, I think I may have been more excited than Zoe was when she got through that first book. But after listening to those really early reader books for the twenty-third time? Well, it was a bit tedious. Now she’s reading books that have actual plots – they’re still short books, but with real stories, not repeating the same phrase over and over again. And in just the last couple of days, she’s started reading a ton of other things and I’m realizing just how many words there are all around us on signs and boxes and papers and bumper stickers and buildings…(“Why does the cracker box say ‘open for fun’?” “Does it say ‘Amazon’ on that box?”). It really is like language acquisition all over again. Oh, and now that she’s reading, she does have her own library card. I will admit, I had tears in my eyes when she checked out her own books for the first time.

At our local library, checking out books on her own card!
I haven’t gotten a video of Zoe reading, she’s still self-conscious about it, even though she really does a great job. But Hazel wanted to get in on the action. So here she is doing a very dramatic reading of “No No Yes Yes” by Leslie Patricelli.


Recent Comments